Introduction

Our amazing Internet abounds with useful guidelines on what to put in our unit tests and what should go in integration tests. So rather than recapping those discussions, I will begin this post by simply noting that in our builds we usually want to have the option of running these independently of one another. We typically want our unit tests to run fairly quickly without requiring external set-up (e.g., launching a database instance, connecting to a VPN, etc.), while we are fine with imposing those requirements on our integration tests. This is because the module which is being integrated with ‘something else’ will have dependencies on that ‘something else’, and launching or connecting to a test instance of the ‘something else’ may slow down your ‘code, test, debug’ development cycle. Many developers prefer to run only unit tests in the ‘test’ phase of that cycle, and defer running integration tests until they are ready to push their latest commits to a shared code repository
The test framework I tend to use, testNG, has support for separating out unit tests from integration tests. However, we need to do some extra work in our build.gradle files to set up a task that allows us to run the latter. Doing this over and over for every project can be a pain. Fortunately, Gradle’s plug-in mechanism provides an easy way for you to share a re-useable plug-in module which does such set-up, eliminating the need for others in your organization to continually copy/paste mystery code snippets of code. The goal of this post is to explain the workings of the simple Gradle plug-in I wrote to accomplish this task (not 100% perfect yet, see Caveats section), and to show you how such plug-ins can be published to a a Maven repository. Such publication enables your test configuration to be shared with any future project via one additional line in that project’s build.gradle file.
Some reasons why this article might be more useful than the many ‘Hello World’ plug-in tutorials out there: the plug-in code we will walk through not only adds a new Gradle task (integrationTest), it also re-configures an existing task. This type of customization turned out to be quite difficult (at least for me), and I came up dry in my search for supporting examples and/or tutorials on this particular aspect of Gradle plug-in-ology. Neither was I able to find any article that walked me through publishing and consuming my plug-in to/from a Maven repo, so the how-to I provide on that might also be of some unique value.
A final prefatory note: the commands I list for you to follow along with will work with MacOS and Linux, and possibly if you are on Windows using the Cygwin shell. If you don’t have any of those three then you’ll have to tinker to run the examples. I also use Scala in the examples, so if you are Java-only, you’ll have to use your imagination (sorry). Oh, and you’ll also need Docker for the publish part. I could have used the raw file system as a Maven repo, but I happened to be using Nexus running under Docker, and am too lazy to change for the sake of this article.
The Simplest (non-reuseable) Way of Setting up Integration Test Support
Let’s set up integration test support manually first, without a plug-in. The following command sequence should work to setup a simple ‘canned’ project (using Gradle 7.x — might work for other versions, but no guarantees):
dir=/tmp/catbox ; rm -rf $dir ; mkdir $dir ; cd $dirgradle init --type scala-application
In response to the prompts, type:
1<RETURN><RETURN><RETURN>
And you should see output like this:
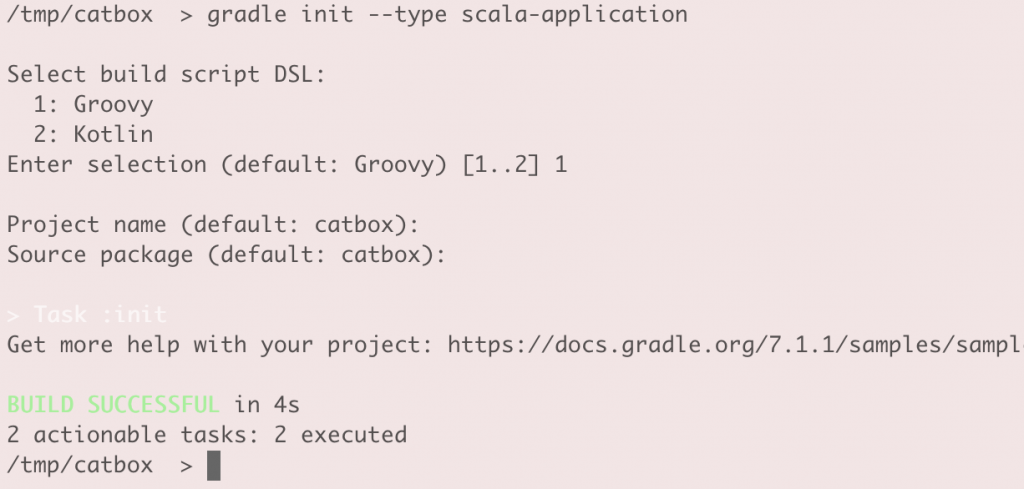
To be sure all is well, run the command ‘gradlew build’ and make sure you see ‘BUILD SUCCESSFUL’ as output. After that’s all working, let’s add a TestNG test, like this:
cat < app/src/test/scala/UnitTest.scala
  import org.testng.annotations.Test
  class UnitTest {
    @Test def test(): Unit = {
        if ( "true" == System.getenv("testShouldFail") ) {
           assert(2> 10)
       } else {
           assert(2> 1)
       }
     }
  }
 EOF
And next we will try to run it, setting the environment variable that will force the test to fail. We type:
( export testShouldFail=true ; gradlew 'app:test' )But we note that we see output indicating BUILD SUCCESSFUL. Did our tests even run? Spoiler: it didn’t even compile . This is because out-of-the-box gradle builds expect you to write tests using Junit, not TestNG. To correct that we will change our configuration to use TestNG’s test runner, by adding the the Gradle configuration code below. Note that we are eventually going to make use of TestNG’s support for using annotations to group related sets of tests https://testng.org/doc/documentation-main.html#test-groups. We will configure the test task to not run tests annotated to be in the integrationTest group. Those tests will only run if we invoke the ‘integrationTest’ task, which we will add in the next step. For now, type the following:
cat <> app/build.gradle
     test {
         useTestNG() {       // this switches framework from Junit to TestNG
             excludeGroups "integrationTest"
             useDefaultListeners = true
         }
     }
 EOF
Next, add a dependency on TestNG, if you are on a platform that supports shell, then this command sequence should do it:
cat   app/build.gradle  | \
    sed -e 's/dependencies.*{/dependencies {  testImplementation group: "org.testng", name: "testng", version: "6.8"/' > tmp

mv tmp app/build.gradle
If that doesn’t work, add in the dependency manually. After ‘dependencies {‘ in app/build.gradle, add: testImplementation group: "org.testng", name: "testng", version: "6.8"
If you try running the previous command sequence again you should see a test failure rather than compilation errors:
( export testShouldFail=true ; gradlew 'app:test' )And if we don’t force failure by setting the environment variable, that is, if we simply run
gradlew 'app:test'
and then we should see ‘BUILD SUCCESSFUL’ in our output. Now we are in good shape to try to add integration tests and run them separately. Add the test as follows:
cat < app/src/test/scala/IntegrationTest.scala
import org.testng.annotations.Test
 class IntegrationTest {
   @Test(groups = Array("integrationTest")) def test(): Unit = {
       if ( "true" == System.getenv("integrationTestShouldFail") ) {
          assert(2> 10)
       } else {
          assert(2> 1)
      }
    }
 }
 EOF
Does the test fail when we run the ‘test’ task? Try it.
( export integrationTestShouldFail=true ; gradlew 'app:test' )
Well we explicitly excluded tests annotated as ‘integrationTest’, so that’s why nothing ran.
To remedy this let’s add a specialized task to our build config to run only these such tests.
cat <> app/build.gradle
     task integrationTest(type: Test) {
         useTestNG() {
             includeGroups 'integrationTest'
         }
     }
 EOF
And now invoke the new test target we just added and see if it now fails:
( export integrationTestShouldFail=true ; gradlew 'app:integrationTest' )
If all went well the run should result in an assertion failure with the message “IntegrationTest.test FAILED”
From Copy/Paste Re-Use to Plug-ins
The modifcations to build.gradle that we made above were not hugely complex or time-consuming, but they were still necessary to introduce a relatively minor customization to Gradle’s out-of-the-box behavior. Clearly the more customizations you add in this way the more the possibility for mistakes creeps in. If you want to enforce the use of TestNG and unit test / integration test separation as organizational standards you don’t want this config copy/pasted accross numerous projects. It obscures the build logic that is particular to the project, and it makes upgrades and changes much harder. So let’s implement the above as a plug-in, such that the desired configuration can be set using one line of Gradle configuration code.
Publishing and Consuming the Plug-in via Nexus (running in Docker)
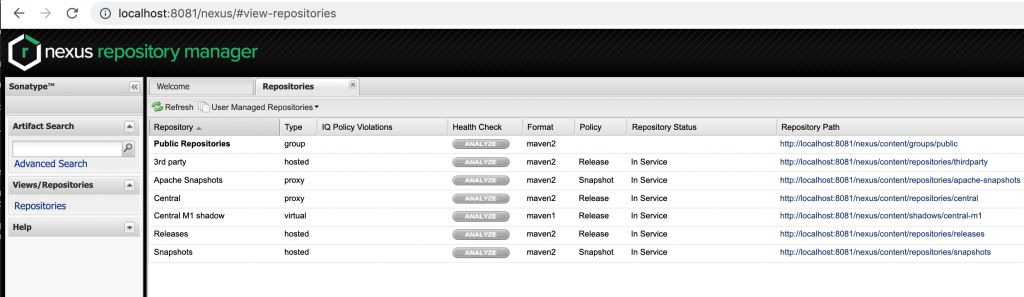
Missing from many plug-in tutorials are examples of how to publish the plug-in for consumption (re-use) in other projects. We will demonstrate that here using Nexus, a Maven repository manager. This could also be done with Artifactory or other products, but I will use Nexus here. I won’t go into details on use of Docker. But, I will guarantee: if you are not using it now, you are missing out. Assuming you have Docker installed, Nexus can be launched via this one-liner
docker run -d -p 8081:8081 --name nexus sonatype/nexus:oss
Type this URL in your browser to bring up the UI:
http://localhost:8081/nexus/
It might take 10 seconds or so, and you might have to refresh a couple of times. You should eventually see a screen like this.
OKAY …. need to write part about how to do what we did above manually and show code for plugin.. Code for plugin lives here-> https://github.com/buildlackey/gradle-test-configuration-plugin